facebook pixel
How the CatDV MAM can be your next AI employee.

How the CatDV MAM can be your next AI employee.

Logging media content can be a long, arduous task. Sifting through hours of content to tag names and faces before the content is actually needed can also seem like a waste of time and money – until you actually need to find very specific footage. Having a MAM that is AI enabled should be considered your next employee acquisition.
CatDV logo
If you think only large production houses and TV stations need to log their footage, then it’s time to consider “hiring” a MAM to be your next media manager to log your footage and always be ready when the next content request comes in.
CatDV MAM

Churches, corporations, universities, and civic entities all create as much content and even more than your local TV station. The footage created by these organizations is just as important and costly to produce, and it needs to be treated just like the pros. As it is, many of these organizations don’t think they have a need for a MAM. They believe that Media Asset Management software is only for professional broadcasters. Most churches, schools, businesses, and local governments don’t have the staff large enough to manage their creative content – much less, take the time to log it for later use. This is why their next “hire” needs to be an AI-enabled MAM such as CatDV.

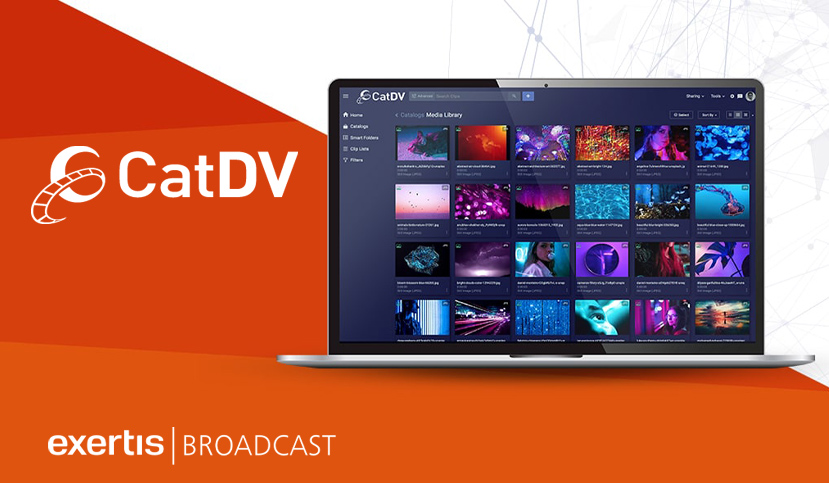
CatDV from Quantum is a highly scalable Media Asset Management software with direct hooks into AI platforms that can log, transcribe, and tag images found in all your footage without ever needing to take a human off a project and slow your production schedule down. With CatDV’s automation engine, all that is needed is to point CatDV to your footage and let the software manage, transcode, and log it so that producers can produce and not be focused on media management.

worship-video-editing
MAM = Media Asset Management

Software for asset management – automation and collaboration tools

+ If you are curious…

  • “D” in DAM = Digital
  • “P” in PAM = Product
Is your MAM AI ready?
If not, then its time to consider an upgrade – time to make CatDV your next hire.
How to LED the Right Way

How to LED the Right Way

There was a time, not too long ago, when only the largest organizations with the biggest auditoriums could afford a direct view LED video wall. Sure, there were some cheap LED curtains around, and projection was relatively cheap in comparison, but that only made sense if you had room for rear projection – at least, when it comes to onstage use. DV LED has a myriad of uses and is an additive solution perfect for creating an engaging visual experience. DV LED can be used for more than just duplicating content across other screens. It can be used as an extension of the lighting and staging design to extend content across the stage.

Let’s talk about how DV LED works and what you need to be thinking about if you are interested in using a DV LED 3rd screen in your production.
There are 5 components to a DV LED wall.
 

  1. LED panels
  2. Video Wall controller
  3. Video wall mounting structure
  4. Video Wall Processor
  5. Video Signal extender

DV LED is a giant TV screen built of small cubes – often referred to as LED Panels. Each panel consists of tiny colored LED (light emitting diodes) bulbs that, when used together, can display video. Think of a tightly packed “Lite Bright” –  for those of you old enough to remember. DV LED is constructed using dozens of these cubes stacked on top of each other like Legos until you have a wall large enough to fill the space.

Each panel is defined by it’s pixel pitch, which is the space between each diode on the panel – measured in millimeters. Typically, manufacturers will market them in configures based on this measurement.

Each panel of your DV LED wall is not a separate TV. It’s a section of the overall image. Each panel only displays a few hundred pixels of your overall image, and the image quality improves the lower your pixel pitch. An HD video signal is made of 2,073,600 pixels in total, and you need that many LEDs just to create an HD video wall. Try doing the math on 4K Video Wall and you will understand why prices on video walls increase the lower the pixel pitch is. Each of these panels has a controller card built into it, that is communicating with a master controller box called an LED video controller. This is the box that takes your video source and maps sections of it to each panel of your video wall.

The resolution of your video wall will be determined by the pixel pitch chosen which determines the size of your video wall. As you can see here, each color of panel represents a different pixel pitch, but each config is the same resolution. The difference is how close the pixels are packed together on each panel, which allows the wall to be larger or smaller without changing the resolution. What matters most is how far your audience is from the screen. As you get closer to the wall, there is a point in which your eyes can see the space between the pixels. Each millimeter of distance between pixels equates to 8-12 feet of optimal audience viewing. So, a 2.5 mm wall has an optimal viewing distance of roughly 25 feet. This is where you can save the most money on your wall. Pick the pixel pitch that matches your audience before you pick the size. Typically, the price goes down the larger the pitch, but keep in mind that the resolution will also go down. Before you jump into thinking your wall needs to be 4k in resolution – trust me, it doesn’t. In fact, most audiences won’t be able to tell the difference between a 1080p and 4K video wall in most viewing cases. With a larger pixel pitch, you can create a larger wall and fill more of the space on the stage, without spending the extra money on a smaller pixel pitch.

Let’s think about the mounting structures. A mounting structure is one of the most important aspects of your DV LED wall. Walls can be flown, or walls can be mounted permanently. For hanging walls, a structure strong and sturdy enough to hold roughly 64 panels at nearly 700 lbs is a requirement. The same holds true for installed walls. The wall you choose must be completely flat and level, or the individual pixels of the wall will drift and bend creating what’s called the “Christmas tree effect”, where jagged edges affect the integrity of your image’s lines. The structure may cost more than you expect, but a bad

mounting structure can make even the most expensive LED wall look bad. Don’t skimp on this aspect of your install; this is where I’d always advise you to seek professional help and not try to install it yourself.

Next, is the video wall processor. This device takes the video source coming from your production output and conforms it to your DV LED wall. Let say you’ve chosen a wall that’s not quite 1080p in resolution – since you took my earlier advice and went larger instead of denser. In this case, you will need to scale your sources to match the walls resolution. A processor is needed as the controller, mentioned earlier, rarely has one built in. If you choose to have more than one source on the wall at the same time, you may need a processor that can support PIP or image manipulation. In either case, plan on making room in your budget for an image processor to make sure your video wall looks it’s best.

Lastly, we come to the video signal extender. In most cases, your production system is not directly next to your video wall. Your production happens on the other end of the room, or maybe in a different room entirely. Depending on the distance and I/O of both your production and video wall controller, video quality can degrade over long distances and your output signal to your video wall will not look as sharp as it does on your production monitor. To make up for the distance between your production and your video wall processor, you will need to invest in a signal extender which will take your output signals from you production and route them to your video wall, all without losing video quality.

By investing in Direct View LED, your team will have more opportunities to create innovative content that is an engaging visual experience for your viewers. So, if you’re in the market for a visual upgrade, consider Direct View LED technology! Once you see it in your space, you won’t want to go back!

NewTek | Trade in. Trade up. SAVE!

NewTek | Trade in. Trade up. SAVE!

NewTek-Trade in. Trade up -feature-imag
NewTek live production systems are the most complete live production system on the planet. Software Defined Visual Storytelling allows you to ensure your product always uses the very latest technology.NewTek TC Trade-in-Side-product

If it’s time to replace your system, NewTek wants to ensure that existing users receive the best value, which is why they offer the industry’s leading trade-in program. Save thousands of dollars on your next NewTek product purchase by trading in your older models.

Trade-in offers are available across the entire NewTek portfolio of products.
Find out what your trade-in is worth!

Simply complete the form below and one of our product experts will contact you.

Contact our experts to find out how much you can Save!

Which product will you trade-up to?

Why not trade-in your products for one of the most complete video production platforms available today?

*Interested in trading up to other systems?

Here is a complete list of current products available.
TriCaster® 2 Elite, TriCaster TC1, TriCaster 410 Plus, TriCaster Mini 4K, 3Play 3P2.

Canon’s 4K NDI PTZ Camera is On the Bench

Canon’s 4K NDI PTZ Camera is On the Bench

The Exertis Broadcast team put Canon’s CR-N500 (4K NDI) PTZ camera On the Bench and here’s what they found inside…

CR-N500

Canon has over 80 years of experience in optics and image capture, and that experience shows in their latest innovation: The CR-N500.

The CR-N500 produces incredible 4K and HD image quality with the combination of a 1” CMOS sensor and DIGIC DV 6 image processor. These core components provide the image-processing power and speed that enables 4K UHD video acquisition, image stabilization and precise Dual Pixel CMOS AF. On-air pan and tilt movement is possible thanks to the smooth and responsive pan and tilt mechanism equipped with the CR-N500.

Highlighted specs:
  • 1 inch, 4K CMOS sensor
  • 15x optical 20x digital zoom
  • 3 Built-in Neutral Density filters
  • Focal length of 8.3 – 124.5 mm (a 25.5 to 382.5mm 35mm equivalent)
  •  2.8 – 4.5 Aperture, enough for a creamy Bokeh in certain applications
  • 73 Degree Field of Horizontal view, 45 Degrees vertical
  • Dual XLR with phantom power
  • Power over PoE
  • 3G SDI, and 4k HDMI
  • and IT’S NDI HX READY!

Things we thought were most amazing.

Razor Sharp, Fast Focusing on near and far subjects. Fast movements followed by ultra-fast focus. Awesome Low-light performance and amazing color rendering.

We found even more awesome features in the Canon Web UI. LUT support, raw imaging modes, and all the image controls someone who has used a cinema camera or a Canon DSLR would be looking for. This is extremely rare for a PTZ camera. What’s even crazier? It’s priced lower than any other 1” sensor PTZ camera out there. This is what happens when canon takes years of experience and brings it to a PTZ camera.

If you are wondering if Canon has a dedicated controller for this camera, the answer is: Yes – of course they do. It’s what I’ve been using this whole time to control the camera itself. It’s a very responsive and easy-to-use touch screen controller makes tweaking the camera orientation very simple and lets you tap into one of my favorite features easily. That feature is called “trace”. Now, this and most other PTZ cameras have positional presets. Meaning, I push a button in the UI or on a controller that moves my camera to exactly where I want it to be. Trace allows you to record a complex camera movement and then allow you to replay it via a preset. If I want to record a slow pan and zoom across, I can record that movement. Then, move the camera somewhere else, and recall that movement I recorded whenever I want.

Canon-standard components, and a robust feature set aimed at creators who are used to cinematography, make CR-N500 the ultimate choice in PTZ camera. Houses of Worship, theater companies, sports venues, and concert venues could all benefit from the raw power and high fidelity image quality. Plus, camera operators and content creators looking for PTZ functionality with the same quality they’ve come to expect from Canon, need look no further than the Canon CRN-500.

NDI Bridge explained
canon cr-n500 closeup
canon web UI
RC-IP100-remote camera controller

RC-IP100 Remote Camera Controller

Canon’s RC-IP100 Remote Camera Controller provides IP control for up to 99 supported Canon cameras. An additional Canon camera can be controlled through the serial port.

EBP: Why Vimeo Enterprise over YouTube?

EBP: Why Vimeo Enterprise over YouTube?

In this episode of the Exertis Broadcast Podcast, Nick Smith, Rick Puleo, and Matt Bain discuss why organizations benefit from choosing Vimeo Enterprise over other VOD/Streaming Platforms.
Vimeo logo
Vimeo livestream to facebook
NDI Bridge explained

TOP REASONS YOUR ORGANIZATION SHOULD CHOOSE VIMEO ENTERPRISE!
With Vimeo Enterprise, your organization retains control over your content, decides who can watch your content, and what else they see on your company page.

NO UNWANTED ADS
No competitor ads displayed before, after, or around your content.

NO SUGGESTED VIDEOS
No competitor videos displayed anywhere near your content or on your channel.

NO RAMDOM AUTO PLAY
No cat videos to automatically play after your content.

ROBUST ANALYTICS
Know exactly who is viewing your content, from where, and for how long.

BEAUTIFUL BRANDING
Custom branding that makes your channel stand out.

SSO INTEGRATION
Make sure your content is secure to only your audience.

LIVESTREAM ENGAGEMENT TOOLS
Polling, Q&A, Graphic Overlays.

TEAM MANAGEMENT
Manage your team and team permissions.

Bonus: STREAMING CONTROL
Livestream fo Vimeo and then, distribute (recast) the video to YouTube, Facebook, LinkedIn, or any other account via RTMP.

Vimeo’s enterprise tools give you the power to effortlessly and securely share an all-hands, updates, learnings, and more, in real time, anywhere.
vimeo enterprise tools
EBP: NDI Bridge – Everything You Need To Know

EBP: NDI Bridge – Everything You Need To Know

NDI® BRIDGE IS HERE!!!

In this episode of the Exertis Broadcast Podcast, Nick Smith, Rick Puleo, and Jordan Friday all discuss what they’ve learned so far about their own personal experiences using NDI Bridge. From remote video production to remote audio mixing and streaming, the guys talk about many of the new possibilities NDI® Bridge can potentially create for content creators in the future!
NDI-showcase-logo-blk
Vimeo livestream to facebook
NDI Bridge explained

Key Info & Guidance

NDI Bridge is a revolutionary tool allowing users to treat the entire connected world your studio. We want to provide you with as much information and guidance as possible, to ensure you are getting the very best out this incredible tool.

  • When testing NDI Bridge please ensure that your network connection has sufficient sustained network bandwidth to maintain the video streams that you wish to use with reasonable network jitter. You can use a tool like iPerf to test your connection speed.
  • NDI Bridge supports all NDI features; Video, Alpha Channel, Multichannel Audio, Metadata, KVM, Tally, PTZ Support.
  • One or more users can join an NDI Bridge connection, enabled by a single NDI Bridge Host.
  • NDI Bridge makes it easy to access the Public IP/Port values that must be shared with clients wishing to join the Bridge….

How to Successfully Configure Your Port Forwarding

NDI® greatly simplifies sending high quality, low–latency video across your network. In more complex cases, though, another factor may need your attention.

To extend beyond the local network, applications (such as NDI Bridge) use network communication ports. Connecting to a local application from an external network requires targeting the correct port, and that your network router is set up to accept traffic at that port.

This is much like an office with one main telephone number, but many extensions. On a wide area network (WAN) like the Internet, the ‘public IP number’ corresponds to the main telephone number. Your firm provides a list of extension numbers, each matching one phone. Likewise, your network router exposes certain ports for external access. If the network router doesn’t expose a port, no-one can connect to it.

The NDI Bridge Host finds your public IP address automatically, and listens for traffic arriving at the port you specify in its configuration app. It cannot, however, automatically configure the router to allow traffic from the WAN to reach that port. (By default, routers expose a limited set of common ports, and are manually configured to use other ports for specific purposes.)

Port Forwarding

Exposing a port (or a range of ports) so an external network can communicate with the port used by internal application is called “port forwarding.”

NDI Bridge port forwarding

To configure port forwarding, you just need to know…